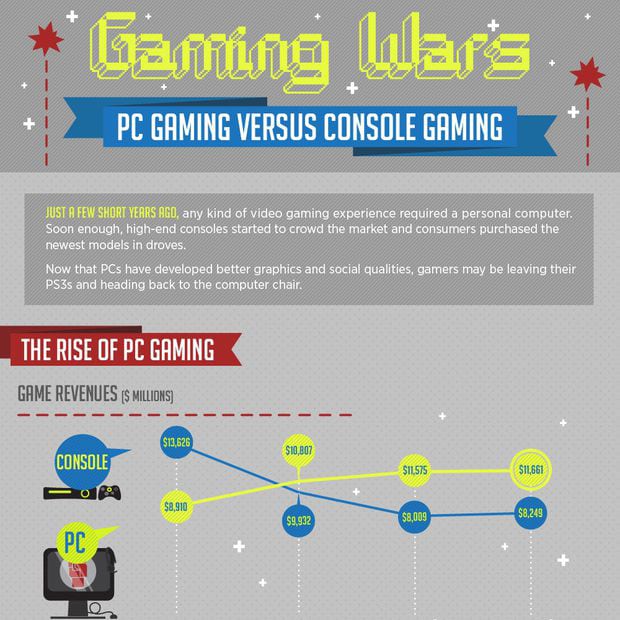
There is no doubt that consoles offer a number of advantages. However, from flexible hardware to relatively affordable games among other benefits, PC gaming is slowly making its mark. In the last few years, PC gaming has gained lots of popularity, and lots of gaming enthusiasts now prefer to play video games on their gaming computers. But how does PC gaming compare to PS4 and Xbox regarding popularity?
See Also: Capture Cards for PC and Game Streaming
The PC gaming platform Steam, which permits users to purchase and share video games, reports that it has at least 125 million active users globally. This figure is much more than the 50 million individuals who are signed up to the Xbox Live as well as the hundred million PlayStation Network subscribers.
If you regularly play games on your computer, then perhaps you’ve always wanted to record and share your played games. However, many people are still in the dark on how they can successfully record gameplay on PC. If you are such an individual, you’ve come to the right place. We are going to show you practical and straightforward ways on how to record your games.
How To Record PC Gameplay
Take advantage of the OBS
Arguably, one of the best ways to record your PC game is by using the Open Broadcaster Software, which is freely available to all users. OBS is a free software program designed for broadcasting live gaming, but it can also record gameplay as well. You can download it easily from the web. Once installed, you’ll have to log in over Twitch. Follow the below steps.
See Also: Best GTX 1070: Good Performing Graphics Card Review
First, you’ll have to download the software and run it on your computer.
Most screen capture programs allow you to configure your quality settings before you start recording. The higher the quality, the larger the final file will be.
In OBS, click the “Settings” button.
- Click the “Encoding” tab. Enter 1000 into the Max Bitrate field.
- Check the “Use CBR” box and set the Quality Balance to 10.
- Check the “Use Custom Buffer Size” box and set the Buffer Size field to 0.
- Click the “Broadcast Settings” tab and select “File Output Only”. This will just record the video to your computer.
The next step will involve setting your recording hotkey. having a recording hotkey will make it easy for you to start and stop recording. In Open Broadcaster Software, right-click the “Sources” box and select “Add” → “Game capture”.
Select the “Use Hotkey” option and then choose the key you want to use.
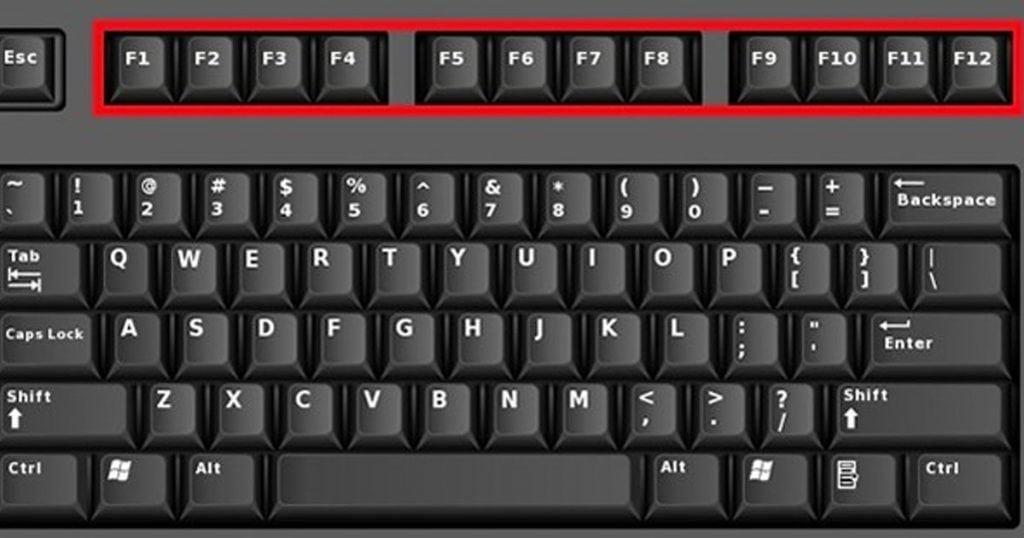
You can choose any key as your hotkey preferably from the function keys but ensure it’s not a key that you will be using in-game so you don’t mistakenly keep generating hot keys during gameplay
See Also: 6 Best Action Role Playing Games (ARPG)
Once everything is all set up and your recording software is configured and running well, you can start playing your game. Get to the point that you want to start recording. Press your hotkey to record your game footage, it’s that simple. Your game will begin recording to your computer. However, depending on your quality settings, you may or may not notice a decrease in the performance of the game once you start recording. If your recording quality is high, you’ll notice that it’ll start taking up more space on your computer.
Press the hotkey again when you are done recording, The recording will stop and the file will be saved on your hard drive. By default, the videos will appear in the “OBS” folder in your “Videos” folder.
Use the Windows 10 Game Bar
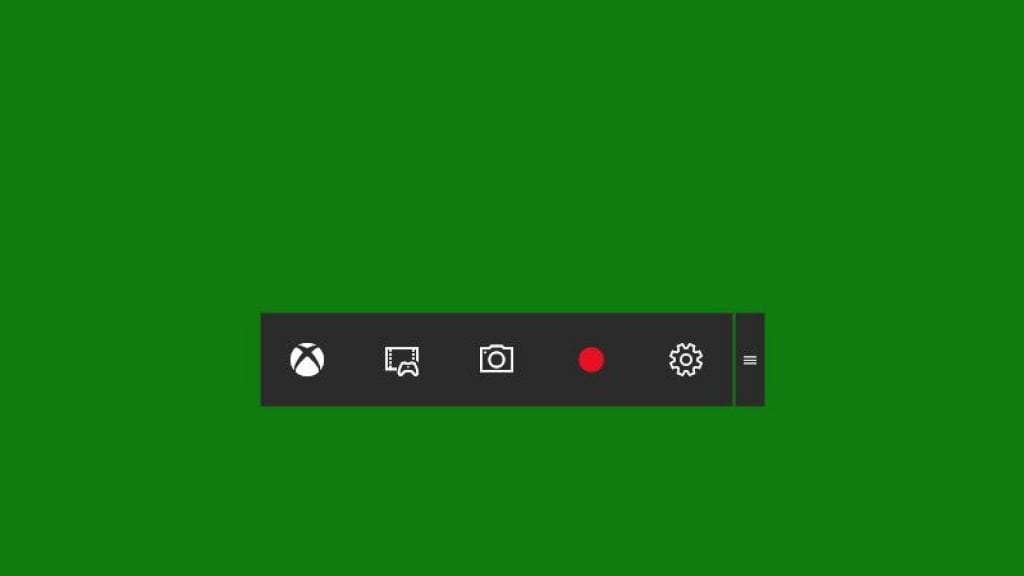
It is imperative to note that Windows 10 features a built-in tool for recording your PC games. This implies that you don’t have to install any additional recording software. This particular tool offers ease of use and equally boasts of an excellent quality of recorded gameplay. You can upload gameplay footage to YouTube or any other video-sharing site — or just keep the clip on your own PC and share it with your friends with this tool. For you to capture your video, you’ll have to follow the below steps.
First, launch your game and play. As you play, press the windows button plus G and the game bar with be displayed. You can check the options tab to modify the settings of the video recording. To begin recording your gameplay, press the Windows key plus Alt plus the R key combination. Your captured video will be saved in MP4 format.
To call up the Game Bar, just press the Windows key + G. This works in any game—and, in fact, any PC application—with one major caveat: The Game Bar only supports full-screen mode on a small number of games.
Once the Game Bar is open, you’ll see a row of seven buttons. Here they are, from left to right:
- Open the Xbox app
- Take a screenshot
- Record the last 30 seconds of gameplay
- Start a recording
- Start a Beam broadcast
- Settings
- Move (click and hold to drag the Game Bar around)
If the Game bar is not open—or won’t open because the game is in full-screen mode—you can still take a capture of the video and take screenshots. To start or stop recording, press Win + Alt + R. To grab just the last 30 seconds of gameplay, press Win + Alt + G. And for a screenshot, press Win + Alt + PrtScn.
Capture your PC video games using ACTION
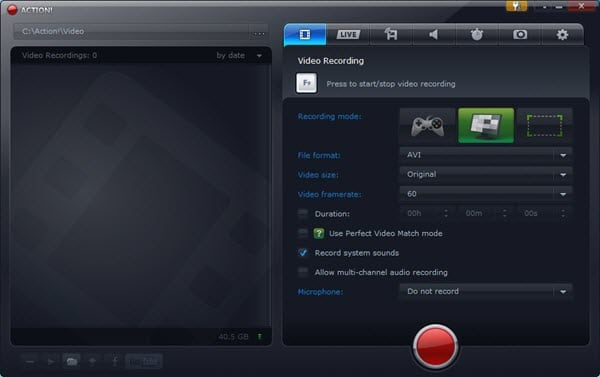
Here is another fantastic recording tool with numerous incredible options. It allows you to record Ultra HD quality with FPS and also support live commentary. It is equally easy to use and boasts of a remote control feature which enables users to access the software from their Android devices. What’s more, it comes with a built-in video editor which you can use to crop and modify your captured videos
To use this tool, you’ll have to download it from the internet. Run it on your PC and go to the video streaming tab. Choose the recording mode as well as the output format, the video size, and the frame rate. Also, set the video parameters and finally click the RECORD button to start recording your videos even as you play.
Use FRAPS
This is another decent option to record your gaming process. It has some robust features which perhaps makes it a reliable recording tool for your PC games. This particular tool allows you to record your videos at a whopping resolution of 4800 by 7680 and with custom frames ranging between 1 to 120 FPS. If you didn’t know, there is no other PC game recording software that will offer you such type of video recording quality.
It is also an easy to use software, once you have downloaded and installed it. It is highly recommended that you should opt for the paid version since the freely available one adds watermark to your videos and has length restrictions. After you’ve installed the app, select the Movie tab and subsequently set a hotkey for recording videos. Choose FPS as well as other video parameters you’d prefer. After this, minimize FRAPS and start playing your PC game. To initiate the recording process, press the hotkey. If you are a fan of PC gaming who’s mad about quality, then this is the best video recording tool for you.
Of course, there are other software for recording your games on PC. However, these four are arguably the best, thanks to some of their impressive individual features. Try using any of them, and you’ll see for yourself how great they are.

