Truth be told, nothing is more frustrating than a glitchy, slow, and downright unreliable Wi-Fi connection, especially in a day and age when over 80% of our social and professional lives revolve around the online stratosphere. But, as it happens most of the time, the connectivity might not be the problem here.
Rather, the way your operating system’s Wi-Fi connectivity software is set up. This, of course, is a common occurrence for people running Microsoft’s Windows 10 or lower. If anything, we can easily relate to the almost universal, ever-annoying diagnosis of ‘Wi-fi Does not Have a Valid ( Internet Protocol ) IP Configuration.’ Well, here’s what usually causes the problem and how to fix this issue within the shortest time possible.
How the Problem is Typically Manifested
This anomaly is usually characterized via several signals.
1. ‘Limited Connectivity’ Indication

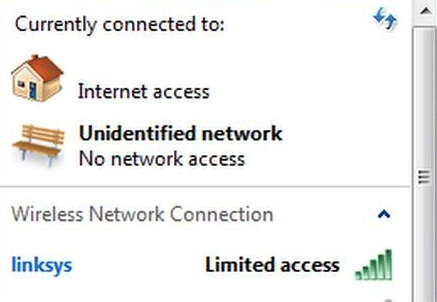
Most often than not, when you can’t access/surf the internet smoothly on your machine, the connection status will read, ‘Limited Connectivity.’ Consequently, the troubleshooting diagnostic tool will fail to detect the anomaly behind this or at best display the ‘Wi-fi Does not Have a Valid ( Internet Protocol ) IP Configuration’ message.
2. Spontaneous on-off Connection
Often characterized by the ‘on-off’ spontaneous connection, particularly after an extensive Windows update. Sometimes it is the aftermath of changing the computer’s server DNS address found in the Internet Protocol Version ( IPV4 ) or TCP settings.
If this describes your situation, then the following steps ought to help you get back online as soon as possible, and the same time solve the error that states that your Wi-Fi connection does not have a valid IP configuration.
There is a problem with your Computers IP/TCP Stack
The error message that warns you that your Wi-Fi connection does not bear a valid IP address configuration implies that there’s an anomaly with your gadget’s TCP/IP Stack, which, as you would expect, results in an interruption of the connected internet service. There are a few ways to correct this, and the appropriate method ( in your case ) hinges on the underlying problem of stack corruption.
Here is How to Fix a WiFi That Doesn’t Have a Valid IP Configuration
1. Start by Disabling Your Network
The first and usually, one of the most straightforward approaches, is to disable your wireless internal network system. If you are running Windows, this option can be accessed by heading to the ‘Device Manager’ subset and right-clicking on the wireless network icon. An option to disable it temporarily will appear. Disable it for a few minutes, then turn it back ON. And if the wireless network card was already disabled, turn it ON now. This should fix the problem.
2. Uninstall or Block Unnecessary Apps
There are several apps and DNS software services that are known to interfere with flawless internet connectivity. A good example is Bonjour. It is a software fragment that is at times bundled with iTunes or other dedicated music streaming apps. It may look pretty harmless from afar, but it is known to halt or impede easy Wi-Fi integration in most laptop models. At this juncture, it would be helpful to either disable the app in question or simply blocking it from accessing your computer’s Windows firewall.
To do this, head to the Control Panel menu and then click to access the Windows Firewall tab. Right-click on this tab to reveal the ‘Allow a Feature or Program’ option. Ensure that you complete the process by removing ‘Bonjour’ service if it is on this list. As usual, you will have to reboot your computer to restore the default settings of the Wi-Fi connectivity that had previously been blocked.
3. Update your Computer’s Network Driver
Old or outdated drivers will sometimes result in network configuration errors especially if you’re always switching from one Wi-Fi band to another one. Updating your laptop’s network adapter typically corrects the anomaly.
And to do this, go to the machine’s control panel then proceed to the ‘Device Manager’ option and select ‘ Network Adapter.’ You can then update the driver by choosing one of the available options under the subset. Reset the newly updated adapter as soon as the update is complete, by first disabling it for a few moments and then turning it back ON.
If you’re wondering how you can update your laptop’s network driver with a faulty Wi-Fi connection, then the answer lies in making use of the laptop’s ethernet connection port. If you’re not sure whether your network driver is up-to-date, then simply uninstall it and re-install it back.
After this, you should consider restarting the router and rebooting the PC before attempting to connect to the Wi-Fi, just to make sure the changes applied during the update have taken root in the system’s underlying software. Note that you may be required to re-enter the Wi-Fi’s password while renewing the connection.
4. Reset your PC’s Winsock
If for one reason or another you’re convinced that your PC’s Winsock has been corrupted with malware or a random software glitch, then resetting it will, without doubt, resolve the connection issue. And for you to do this, open up your laptop’s command prompt from a login ID with administrator access. You can get here by searching for ‘cmd’ on your laptop’s start menu.
After this, type in the following acronym ‘ NESTSH WINSOCK RESET’ and press the ‘Enter’ key. As soon as this is done, restart the PC and attempt to establish reconnection to the nearest strongest Wi-Fi network.
In Closing
Apart from the above approaches, there are also several other miscellaneous but practical ways to restore your PC’s wireless connectivity. A good example is adding an appropriate default gateway for your PC. Speaking of which, to confirm that your computer’s network bears the correct default gateway settings, simply head to the ‘Computer and Network Sharing Center’ and right-click on ‘Change Adapter Settings.’ From this, right-click on the icon under the network adapter and proceed to ‘properties.’ You ought to find the ‘Default Gateway’ under the IPv4 where it is written ‘advanced.’ Also, this router address is usually unique to your PC.

